Building the Frame
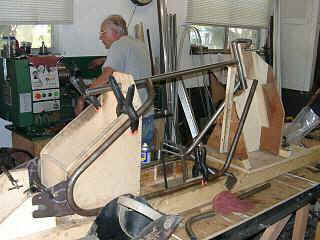 That's me in the background, hard at work making an axle. How
do you like my frame jig? Later on I built a metal one, but
MDF board is fine for one or two scooters, but after awhile, with
moisture and occasional bumps, I would rather replace it. That's me in the background, hard at work making an axle. How
do you like my frame jig? Later on I built a metal one, but
MDF board is fine for one or two scooters, but after awhile, with
moisture and occasional bumps, I would rather replace it.
If you want to see my home made pipe bender, just click here!
|
|
|
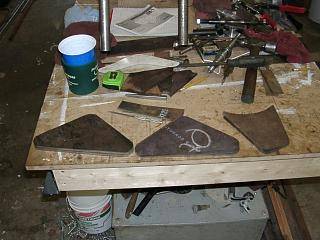
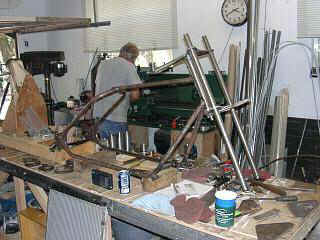 Here is a frame that's fresh out of the jig. Notice the
triangular plates at the edge of the bench. They are part of the
front fork assembly. Here is a frame that's fresh out of the jig. Notice the
triangular plates at the edge of the bench. They are part of the
front fork assembly.
|
|
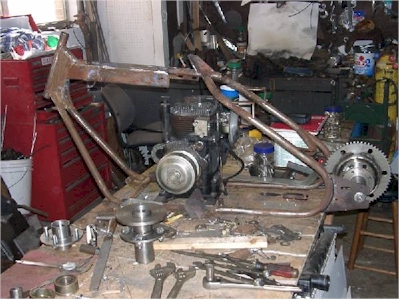
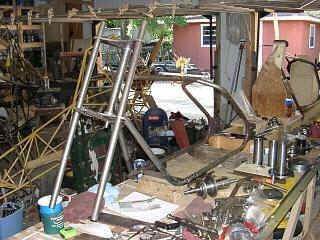 This is starting to look like an assembly line! Notice the hub
parts. Both front and rear hubs were made by me on my lathe. Just
in case you are wondering....that is an airplane in the
background. Its a modification of the "Air Bike".
I'm powering it with a 1/2 VW motor. More on that later. This is starting to look like an assembly line! Notice the hub
parts. Both front and rear hubs were made by me on my lathe. Just
in case you are wondering....that is an airplane in the
background. Its a modification of the "Air Bike".
I'm powering it with a 1/2 VW motor. More on that later.
|
|
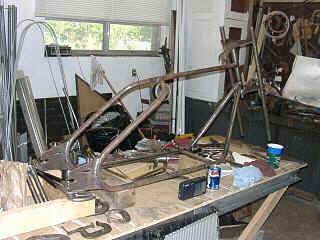 This
is a good shot of the frame. As you can see there's still lots of work to
do. This
is a good shot of the frame. As you can see there's still lots of work to
do.
|
|
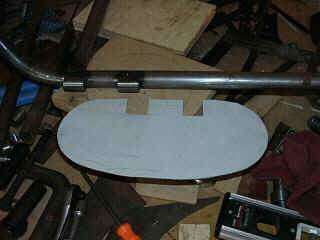 Just checking the alignment of my footrest blank with the lugs
on the frame before I start beating on it. Next comes a little
hammer forming at the bench vice. Just checking the alignment of my footrest blank with the lugs
on the frame before I start beating on it. Next comes a little
hammer forming at the bench vice.
|
|
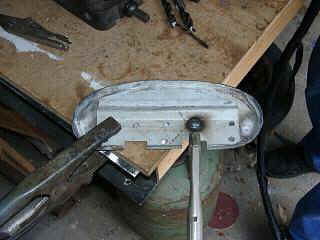 Now that the top plate has been hammered into shape, I can weld
the brace onto the back of it. A few spot-welds should do
the trick. What you did not see is the hand made forming
block made from a solid aluminum billet. I will get you a picture
of that later. Now that the top plate has been hammered into shape, I can weld
the brace onto the back of it. A few spot-welds should do
the trick. What you did not see is the hand made forming
block made from a solid aluminum billet. I will get you a picture
of that later.
|
|
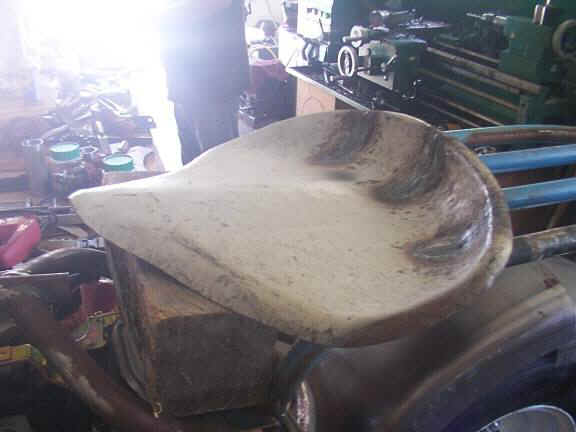
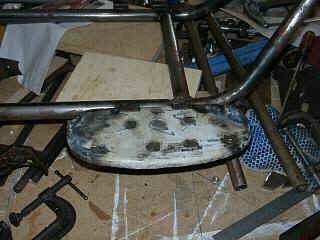 Test fitting the foot rest. It sure is ugly, but just wait till
it's finished. Test fitting the foot rest. It sure is ugly, but just wait till
it's finished.
|
|
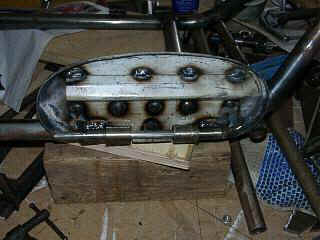 The bottom of the foot-rest. Notice the two bushings and
pivot pin. Best thing to do is weld them to the plate while
it is being test fitted. That way it won't bind up on you
later. The bottom of the foot-rest. Notice the two bushings and
pivot pin. Best thing to do is weld them to the plate while
it is being test fitted. That way it won't bind up on you
later.
|
|
 These are the two plates that hold the triple tree together.
That is, the front forks and yolk assembly. These are the two plates that hold the triple tree together.
That is, the front forks and yolk assembly.
|
|
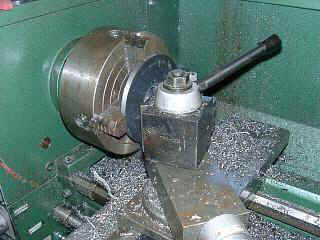 Machining one of the disks that later gets welded onto the
hub. The rim bolts to this disk. See photos below. Machining one of the disks that later gets welded onto the
hub. The rim bolts to this disk. See photos below.
|
|
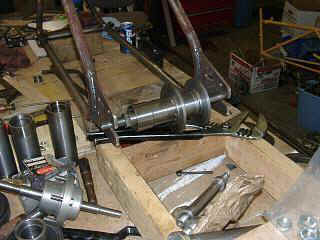
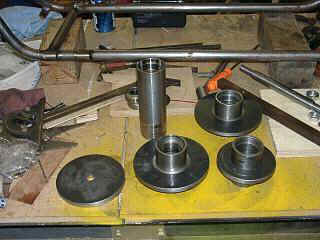 From lower left. Hub-disk, partially machined. Rear axle
tube with bearing recesses machined in, and three front hub
assemblies under construction. From lower left. Hub-disk, partially machined. Rear axle
tube with bearing recesses machined in, and three front hub
assemblies under construction.
|
|
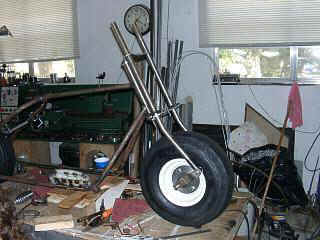
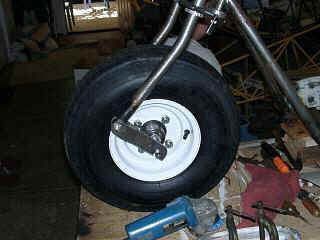 Tire mounted between frame forks, on front hub,. Notice the
off-set pivot point. There will be a spring attached to a bracket,
that will help cushion the ride a bit. The tire shown is
actually bigger that a stock one. Tire mounted between frame forks, on front hub,. Notice the
off-set pivot point. There will be a spring attached to a bracket,
that will help cushion the ride a bit. The tire shown is
actually bigger that a stock one.
|
|
 Test fitting the rear hub assembly to the frame. Look-in
pretty good so far! Test fitting the rear hub assembly to the frame. Look-in
pretty good so far!
|
|
Can you guess what this is?
|
|
 A shot of the front forks and front hub being test fitted. A shot of the front forks and front hub being test fitted.
|
|
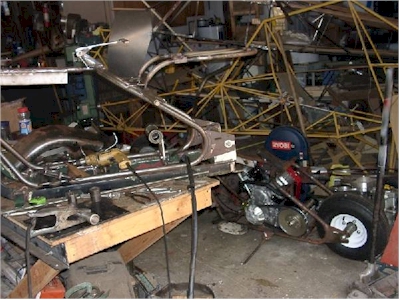
 Here
you can see a luggage rack being fitted to a new frame.
Notice that I have finally made a metal frame jig to replace my
wooden one. You might have to look closely. Follow the
bottom frame rail from the rear hub forward to the fork
tube. See the "C" clamp holding things
together.....yea you got it. There is also a fender in the
background that is undergoing its own transformation. Here
you can see a luggage rack being fitted to a new frame.
Notice that I have finally made a metal frame jig to replace my
wooden one. You might have to look closely. Follow the
bottom frame rail from the rear hub forward to the fork
tube. See the "C" clamp holding things
together.....yea you got it. There is also a fender in the
background that is undergoing its own transformation.
By the way. The frame jig was made from the frame of a Cushman
golf cart! Talk about recycling!
|
|
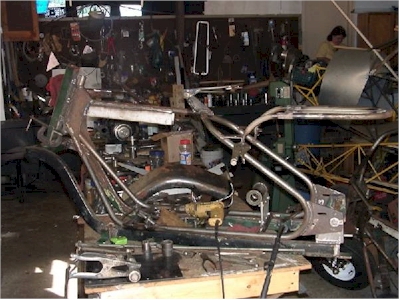
 Ok,
time to test fit the motor and rear hub. Since each one of
these scooters was built by hand by me, some on good days.....some
on bad days......each of them is a little different. Hey that is
what gives an ordinary machine its unique personality! Ok,
time to test fit the motor and rear hub. Since each one of
these scooters was built by hand by me, some on good days.....some
on bad days......each of them is a little different. Hey that is
what gives an ordinary machine its unique personality!
|
|
|
 Another shot of the test fit of the luggage rack. As you can
see, I have more than one scooter under construction. Another shot of the test fit of the luggage rack. As you can
see, I have more than one scooter under construction.
(Side note)
Another shot of my planes. I'll be setting up a website for
those as well.
|
|
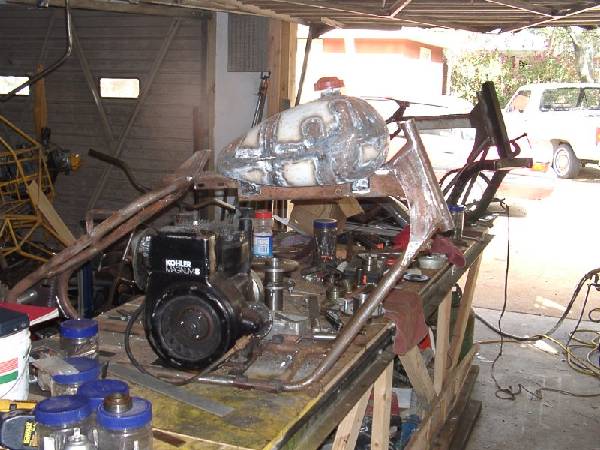
Here's a shot of my homemade scooter frame and homemade gas
tank. If you don't have a mega-bucks powered machine to
stomp one out for you all in one wack, then you have to take a
bunch of pieces of sheet metal and weld em all together to make a
tank. It's way to complicated to get into here, but there
is a book you can get called "The Sheet Metal Fabricators
Handbook". It will explain better what I am talking
about. |
|
 |
|
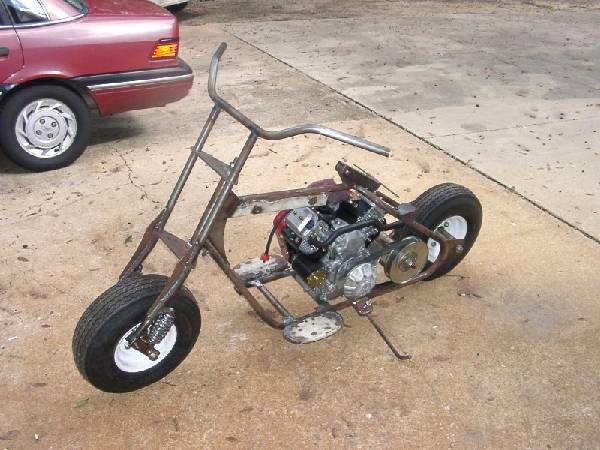
Ta Da! A complete "rolling" frame. Just
add an electrical system, gas tank, seat ..... and a whole lot
more, and you can ride away into the sun set!
|
|